
Power Business Intelligence is not only use to create meaningful and interactive dashboards but also allows you to share your report in different ways such as export the report into a PDF file, publish it onto a webpage or send them via email. When you are ready and satisfied with your report prepared on power BI desktop, you can share it with others like team members, manager or clients etc.
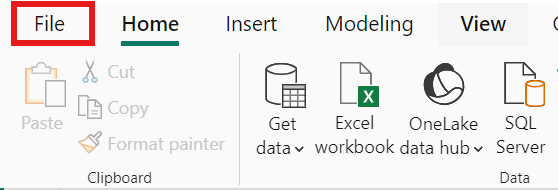
If you would like to share your report click on the File tab at the top menu bar and click on the Share tab. From this menu, you can also select the method of sharing you would like to use.
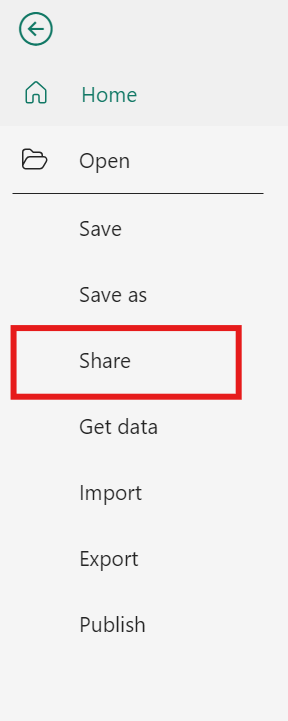
And if you want to Publish your report, you need to follow these steps.
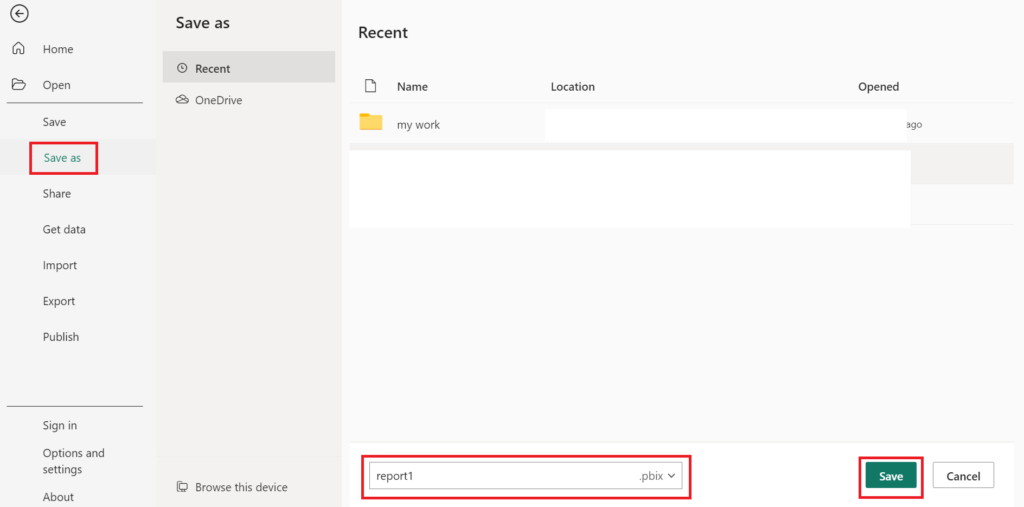
- Once your report has been prepared, before you are going to publish first, Save the report. To save it go to File and select Save As or by using the save icon. This would save a .pbix file on your system.
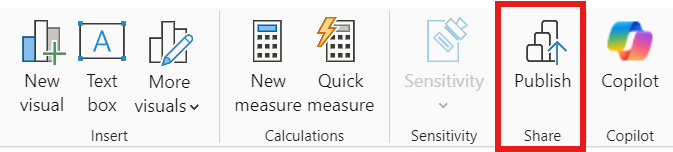
2. After save the report, Open the Home Tab on the Ribbon
Click ‘Publish’.
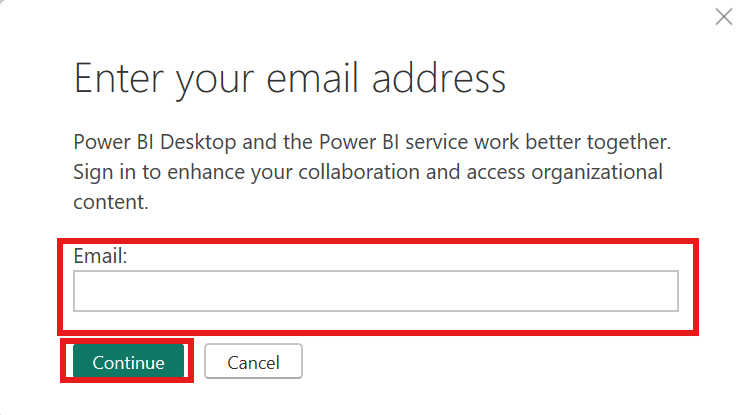
3. If you’re not already signed in to the Power BI service, enter an account, then click or tap Sign in.
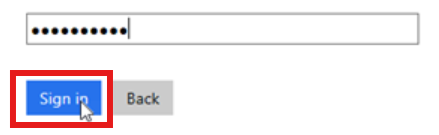
4. Enter a password, then click or tap Sign in.
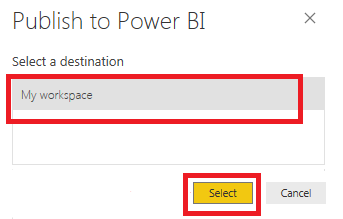
5. After sign in to your account, a dialog box will appear asking you to select the destination where you want to publish your report.
Choose the workspace you want to publish to. It can either be a personal workspace, or a dedicated one, if you are using Power BI service for organization usage. Click Select to go on.
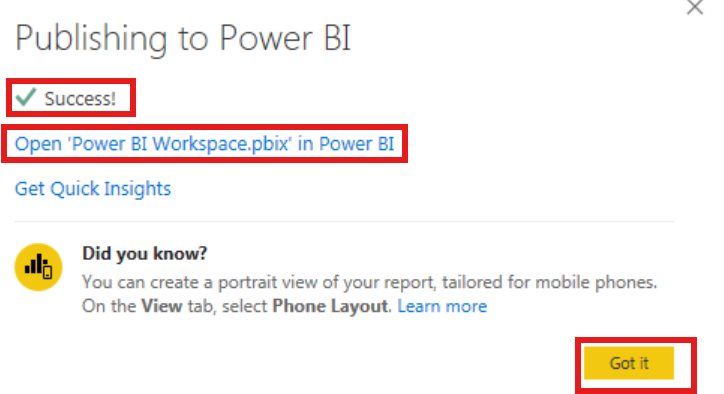
6. Power BI will now upload this report to the workspace which you selected. Depending on how large your report is and your network speed, it may just take a few moments. Once this publishing process is complete, you’ll have seen a dialog notification stating you’ve successfully published your report.
7. After publishing the report, log in to your Power BI services account. For log in, click on your username and select the “Power BI service” option from the dashboard.
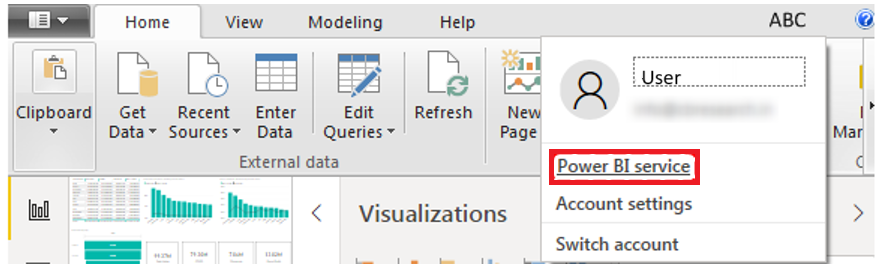
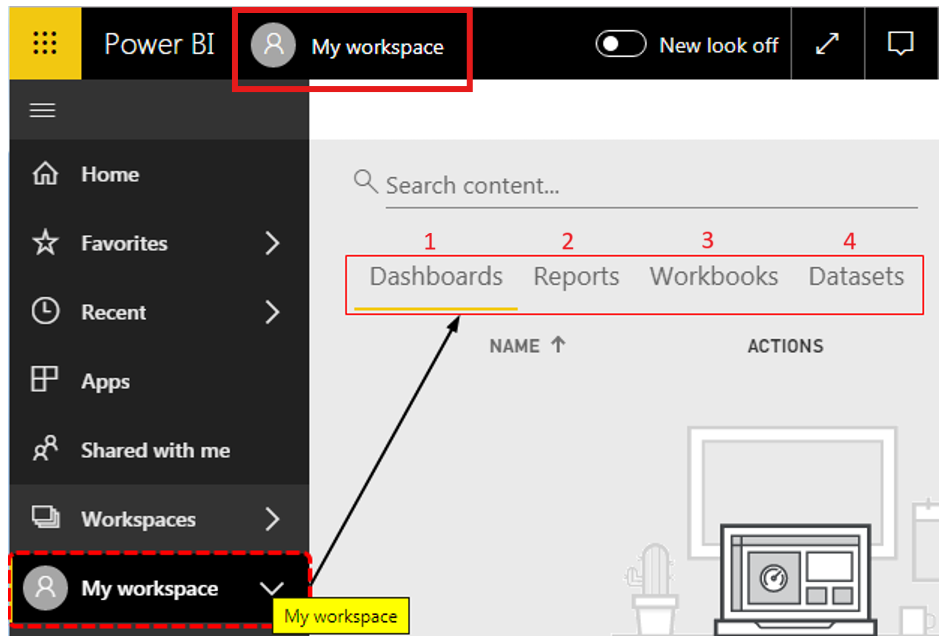
8. When you open your Power BI service account, your published dashboards and reports, by default, sit under “My workspace.” It is similar to our “My Documents” folder on your computers and laptops.
Select the “My workspace” folder. You can see four tabs:
- Dashboards
- Reports
- Workbooks
- Datasets
Source – https://www.wallstreetmojo.com/power-bi-share-report/
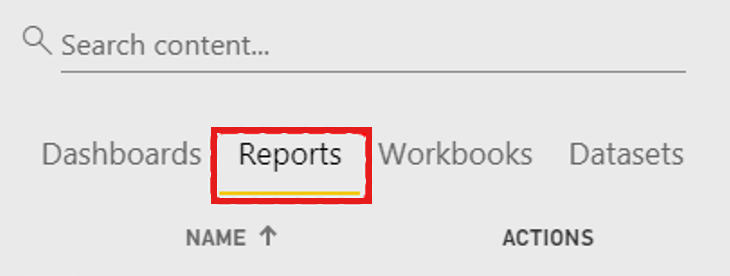
9. Access your Report: You will also get a link to open the report in Power BI service. Click on “Reports” to see the name of our published report. Click on this to view the report online in detail.
Sharing Reports in Power BI
The easiest way to share access to your reports and dashboards in the Power BI service is to share a report. You can share it with both people inside and outside your organization. So, it’s not just about disseminating data; when you share reports in Power BI, you’ll gain shared understanding, teamwork, and enabling teams towards making informed data-driven decisions.
There are different methods we can use to share reports in Power BI.
Report sharing via Power BI Service
After Publish the report and discover the Power BI service (app.powerbi.com), there are some steps you need to follow to share your report or dashboard with anyone you want.
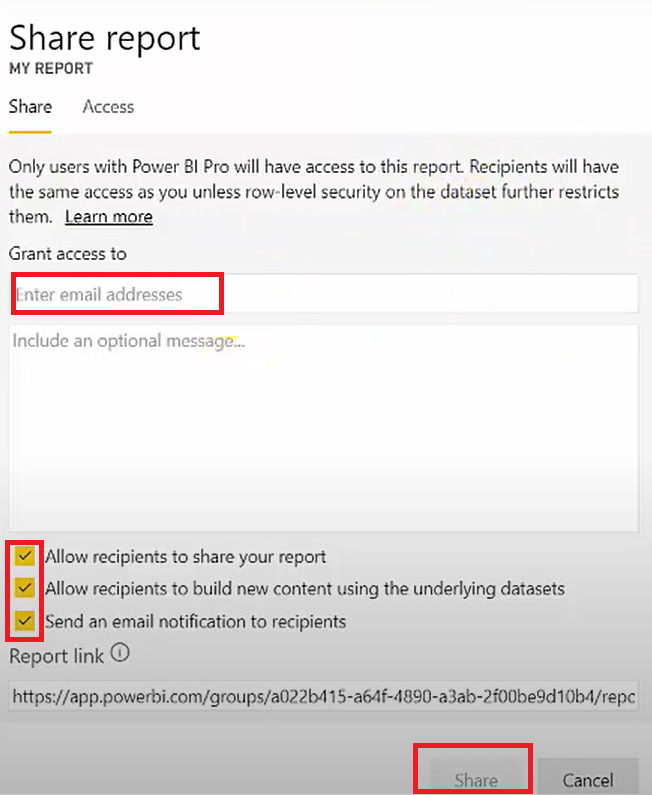
Step 1: Locate the report to be shared in the Power BI service and click the Share button at the top right.

Step 2: Enter recipient e-mail addresses to whom you want to share the report either group or individual.
Step 3: Optionally, add a message and set viewers to be able to share the report.
Step 4: Click “Send”. Now, the recipient will get an email with a link that they can use to view the report.
Report sharing via link
When you share your dashboard or report to the recipients, they can view it and interact with it. If you give them permission, they can edit it, make a copy of it, and share it with their co-workers. To give the access you can share the report via link as well.
Following steps you need to follow to share the report via link.
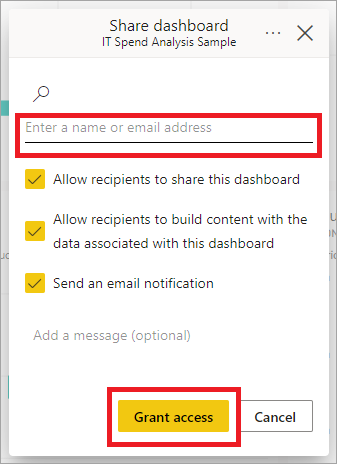
- Select Share button: In a list of reports, or in an open report, select Share for proceed.

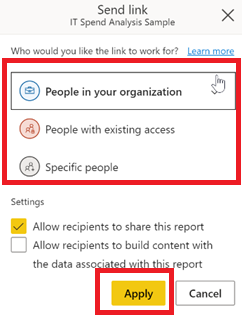
2. When you want share the report via link, you can select the people in your organization to whom you want to share. Options are available on the screen. Choose the best one as per your demand. As depicted in the picture.
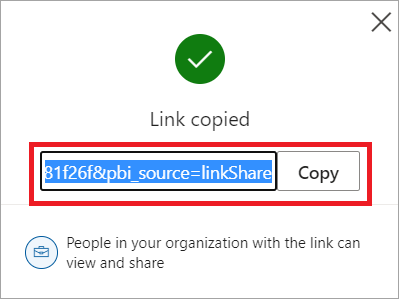
3. Now, You can share reports via link by selecting Copy link will automatically generate and copy a shareable link to your clipboard that give access to the allowed recipients.
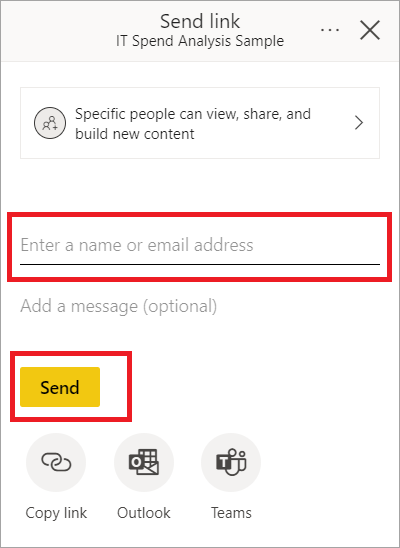
4. You can also choose to directly send the link to Specific people or groups (distribution groups or security groups). Just enter their name or email address, optionally type a message, and select Send.
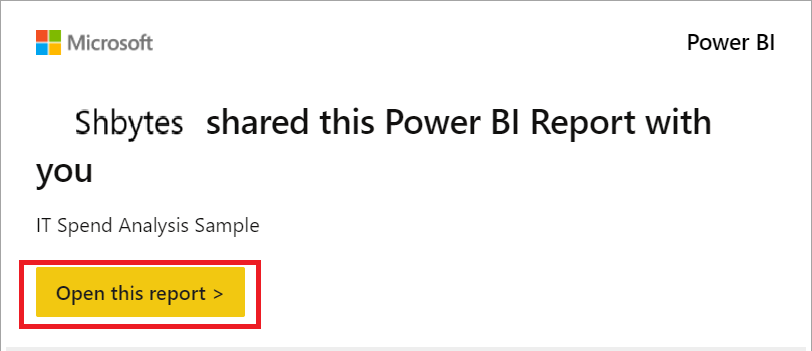
5. After you select Send button, Power BI sends the link via email to your recipients.
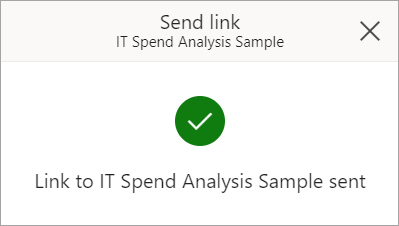
6. After receiving the email, your recipients can click on Open this report, assuring him or her access to the report via a sharable link.
Share Dashboards via link: You may also share dashboards with users by allowing them to access them directly, but not through assigning links with access privileges as such
Manage permissions to a report
Managing the permission on reports is vital towards data retention, compliance management, enhancement of collaboration and integrity of the organization. This helps the businesses to control the use of reports and protect the confidential materials from being abused.
There are following steps we need to go through to manage the permission for the report.
- To manage permissions and manage links which grant access to the report, click More options (.) at the top right of the sharing dialog and then on Manage permissions.
The Manage permissions pane opens, where you can copy or modify existing links or grant users direct access.
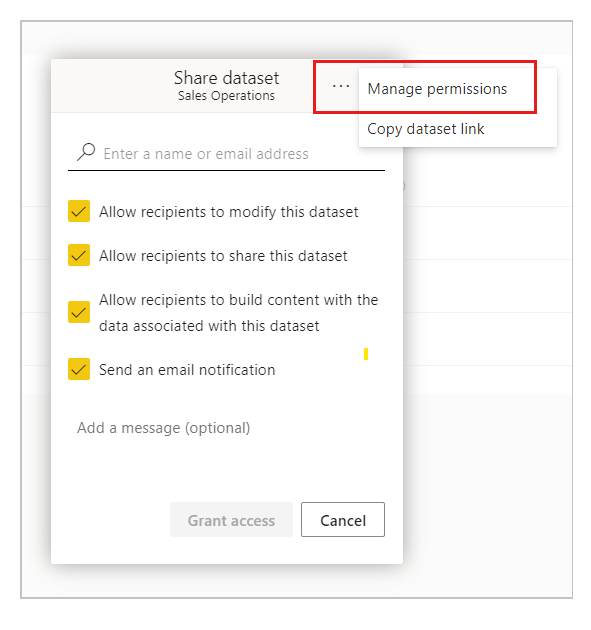
2. When you select Manage permissions on the More options (…) menu. The Managed permissions side pane opens. In the side pane, choose Advanced at the bottom of the pane.
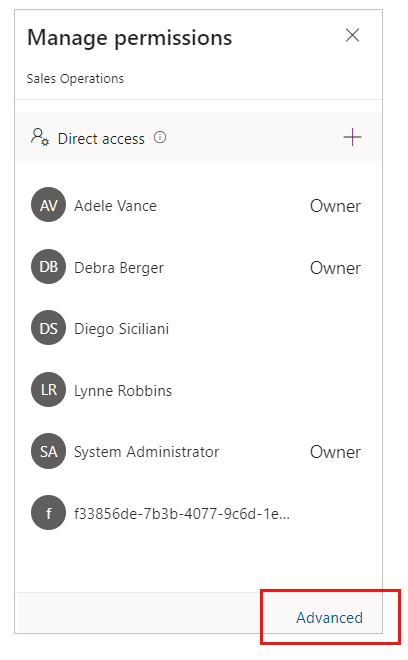
These actions will open the manage permissions page for semantic models. The manage permissions page has two tabs that will assist you in managing access to semantic models.
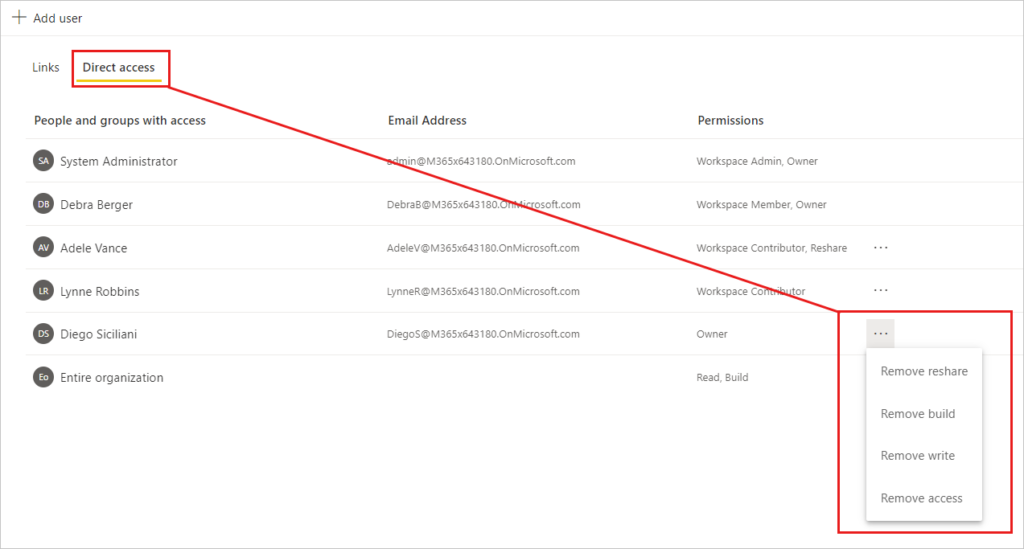
Manage direct access
Under the tab “direct access” is listed the users that have been granted the said access. On each user, you are able to see their email address and the permissions they were given.
- To change permissions for a user, click on More options (…) and select one of the options that are available.
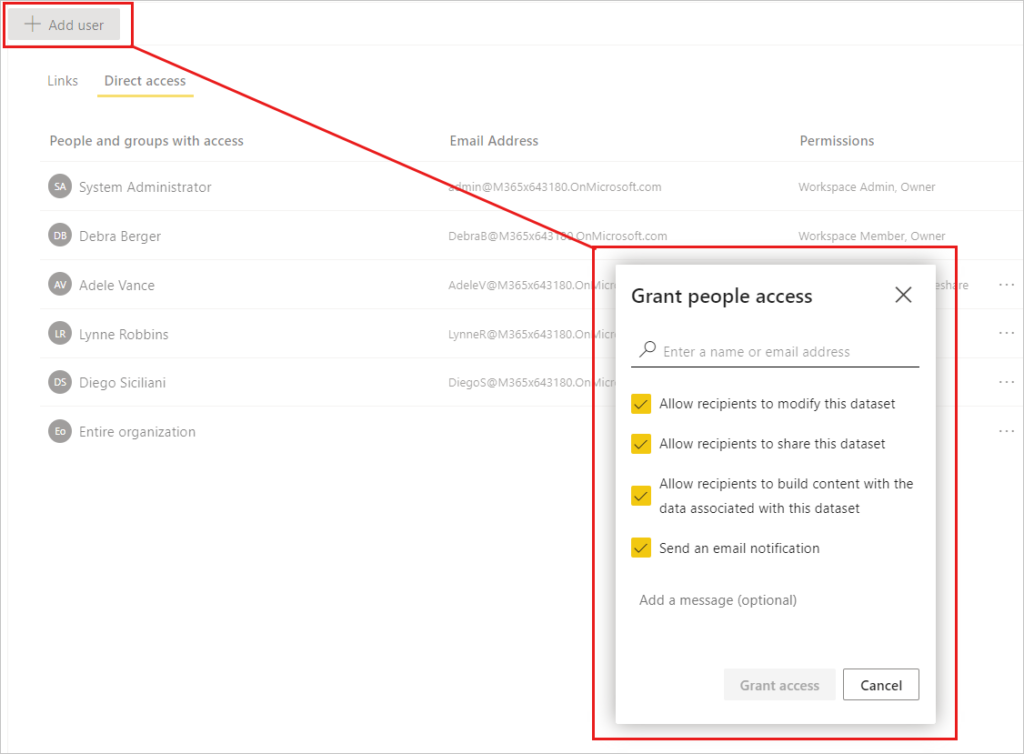
2. To share the access to a semantic model with another user, click + Add User. A window titled Share semantic model open.
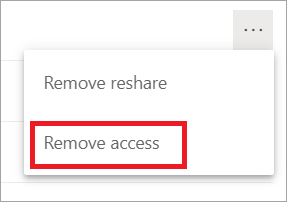
To remove the access
To stop the user access, click the ellipsis (.) beside the permissions of that user and then select Remove access
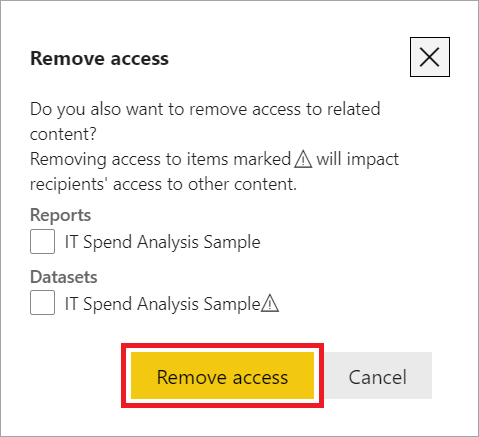
In the Remove access dialog, you decide if you also want to remove access to associated content. This includes reports and semantic models. You should remove access to the associated content as well; otherwise, the associated content may not show properly.
Power BI Workspace
The Power BI workspace is a shared collaborative environment to build, manage, and share Power BI content such as reports, dashboards, datasets, and dataflows. Workspaces facilitate coordinating teamwork and project management and enable multiple users to collaborate on data-related projects.
Workspaces in Power BI are essential for efficient collaboration. They simplify organization and provide some level of access control to improve the management of business intelligence projects in teams.
Why we require to create new workspace?
When you want to share your report or dashboard, you should not share the content from the “My workspace” tab with others as it is a personal workspace and may have some other reports stored there also. Thus, you are able to create a new workspace and share that with your team members.
How to create new Power BI workspace?
To create a new workspace, you need to follow the below steps.
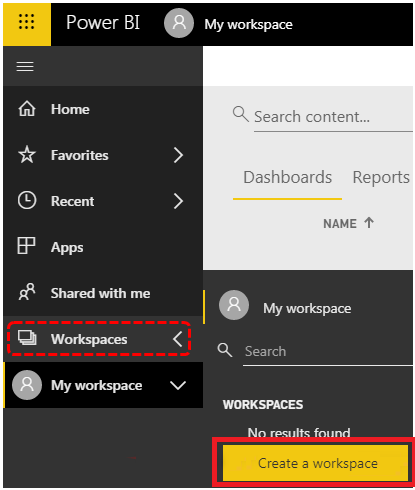
- When you login in your Power service account , First, click on the “My workspace” tab and select “Create a workspace.”
Source : https://www.wallstreetmojo.com/power-bi-share-report
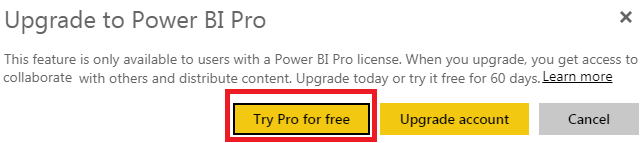
2. once you click on create a workspace, If you are not a pro member, it will ask you to subscribe to the “Power BI Pro” membership. Then, either you can select the “Upgrade account” or “Try Pro for free.”
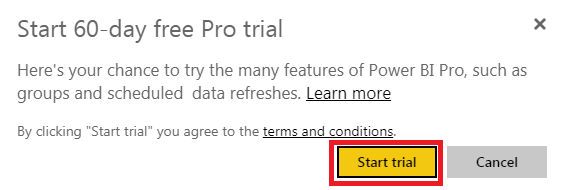
3. If you decide to use a “free trial,” it will automatically be a 60-day free Pro trial.
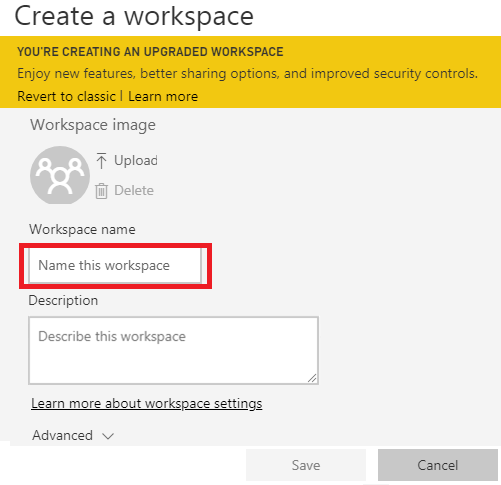
4. Once the free trial subscription process is complete, click again on “Create a workspace”. On clicking this option, this time, “Create a workspace” will expand to the right-hand side of your window.
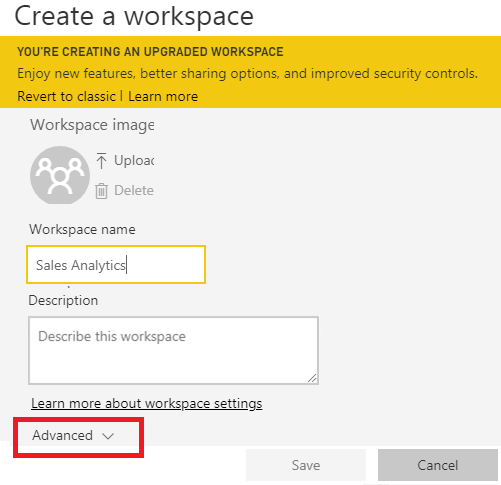
Give your new workspace a name which can see by them to whom you are going to share your report.
5. Then, Click on “Advanced” to see more advanced options. First off, you will need to mention the “Contact list” of those people who can be accessing this report. You have two options: “Workspace admins” and “Specific users and groups.”
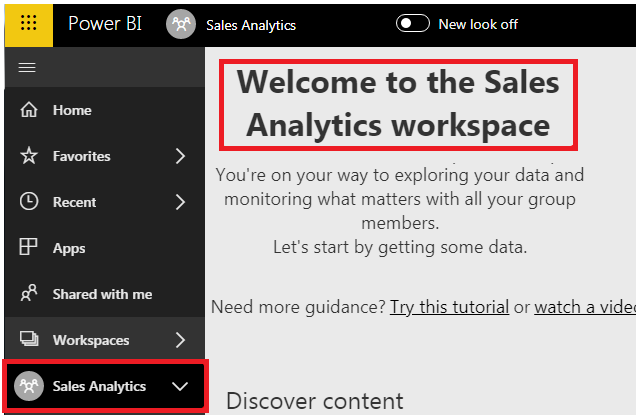
6. If you are going for the option “Workspace admins”, then only admin will see this report and if you want to share the same with other users and groups, then you need to put them in the box. and after that, Click on “Save.”

7. After click on ‘save’ button you will be shift from ‘My work space’ to ‘New workspace’.
But in New workspace you can see, there is no documents, dashboards, reports, workbooks, and data sets in this tab. So, this requires to republish from Power BI Desktop.
8. Once you open the dashboard, under the “Home tab click on the “Publish” option this time. You would have two destination folders: “My workspace” and “Sales Analytics.” Choose “Sales Analytics” by clicking on “Select.”
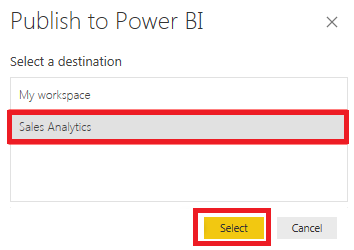
9. Now you can see, It will publish in a new workspace folder( which named as ‘Sales Analytics’).
Note: You can give any name to your workspace as per your requirement.

Source: https://www.wallstreetmojo.com/power-bi-share-report
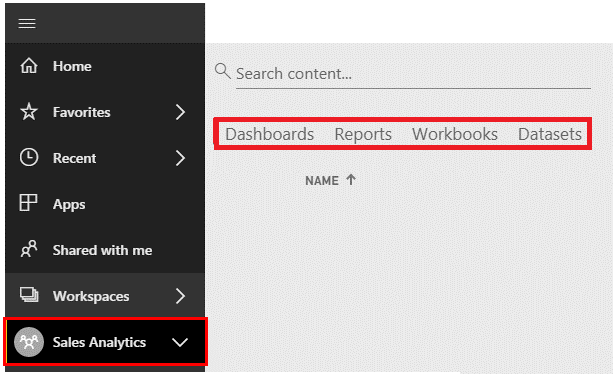
10. Now, when you go back to the “Power Services” account. You can see the options of “Dashboards,” “Reports,” “Workbooks,” “Datasets,” and “Dataflow” within the “Sales Analytics” workspace (New workspace), .
By following these step you can easily create your workspace to share your report with your teammates.